
Pick your volume first
The reason most Halloween manicures disappoint is a mismatch of volume. Someone with a client-facing job on 1 November paints full orange chrome on the 30th and spends a week regretting it; someone going to an actual costume party does a single subtle accent nail and it reads as nothing at all under party lighting. So decide the volume before the design.
The seventeen ideas below run from level one, which passes at any office, to level five, which is unmistakably a costume in its own right. Levels one and two survive a Monday morning. Level three is the sweet spot for most people: clearly seasonal, still adult. Levels four and five are for the party, and for people whose plans on 1 November involve a remover pad.
A note on timing that matters more than any design choice: do your nails on the 29th or 30th, not the 31st. A manicure needs a full day to harden properly, and painting the morning of a party means smudges by the evening. If you are doing a full costume, do the nails first — costume fabric and freshly painted nails are enemies.
Levels 1–2: the office-safe ideas (1–6)
Idea 1: sheer black. A single coat of black over bare nail, deliberately underapplied, gives a smoky grey-brown wash that reads as a considered neutral in daylight and as something darker at night. Nobody at work will comment.
Idea 2: the burnt-orange nude. Not pumpkin orange, which is the mistake — a muted terracotta with brown in it. Autumnal rather than costume, and genuinely the most flattering colour on the list against most skin tones.
Idea 3: the black micro-French. A standard nude base with a very fine black line at the tip instead of the usual white. About two millimetres. Sharp, modern, and only obviously Halloween if you say so.
Idea 4: one matte nail. Paint everything in a neutral, then a matte topcoat on the ring finger only. The texture change does all the work and requires no drawing skill whatsoever.
Idea 5: negative-space crescent. Leave a bare crescent at the base of each nail and paint the rest black. It grows out invisibly, which makes it the longest-lasting idea here.
Idea 6: black on the ring finger only. The most obvious idea on this list and still the most worn, because it takes four minutes and always looks intentional.
Level 3: clearly seasonal, still adult (7–12)
Idea 7: alternating black and terracotta. Two colours, no art, one nail each in sequence. The whole design is colour placement, which means it survives an unsteady hand.
Idea 8: the fine gold line. Black base, one hair-thin gold stripe down the centre or across the base. Use a striping brush and rest your painting hand's little finger on the table — the tremor people blame on skill is almost always an unsupported wrist.
Idea 9: matte black with one glossy nail. The inverse of idea four, and more dramatic. Reads expensive under warm light.
Idea 10: the tortoiseshell. Dab terracotta, deep brown and black in irregular blobs over a sheer amber base, then a thick glossy topcoat to melt the edges together. Genuinely forgiving — it looks better slightly messy.
Idea 11: smoked tips. Sponge black onto the tips over a nude base and blend upward. An old technique that suits this palette perfectly.
Idea 12: the single spiderweb. One accent nail, three lines from a corner and two connecting arcs. Fifteen minutes and the only genuinely representational design that stays subtle.
Levels 4–5: for the party (13–17)
Idea 13: full orange chrome. Chrome powder over a no-wipe gel topcoat, buffed with a silicone applicator. Requires gel and a lamp, and looks like nothing else.
Idea 14: the drip. Black base, orange 'drip' shapes running down from the cuticle. Draw the blobs first and connect them afterwards — trying to draw the whole drip in one stroke never works.
Idea 15: mismatched everything. All five nails different: one matte, one chrome, one striped, one plain, one webbed. Chaotic on purpose, and the most photographed manicure at any party.
Idea 16: black glitter gradient. Loose glitter pressed into a tacky topcoat, dense at the tip and fading upward. Press it rather than brushing it, and do it over a sheet of paper you can fold to pour the excess back.
Idea 17: press-ons. Not a compromise. Modern press-ons look genuinely excellent, go on in ten minutes, come off without damage, and let you wear level-five nails on the 31st and nothing at all on the 1st. For anyone who cannot have painted nails at work, this is the answer to the entire article.
Making it last more than two days
Dehydrate the nail before anything else. Wipe each nail with rubbing alcohol on a lint-free pad and let it dry. Natural oil on the nail plate is the single most common reason polish lifts at the tip within a day, and this one step costs thirty seconds.
Then use a ridge-filling base coat, two thin colour coats rather than one thick one, and — the step almost everyone skips — cap the free edge. Run the brush along the very tip of the nail with each coat, sealing the edge. That seal is what stops chipping starting where it always starts.
Reapply topcoat every second day. It takes two minutes, restores the shine, and roughly doubles how long the manicure survives. And wear washing-up gloves: hot water and detergent lift polish faster than anything else you will do all week. Dark colours can stain the nail plate slightly, so a base coat is not optional with black — without one you will have a faint grey cast for a fortnight.
Curated picks for this guide
We may earn a commission from these links at no cost to you — here's how that works.
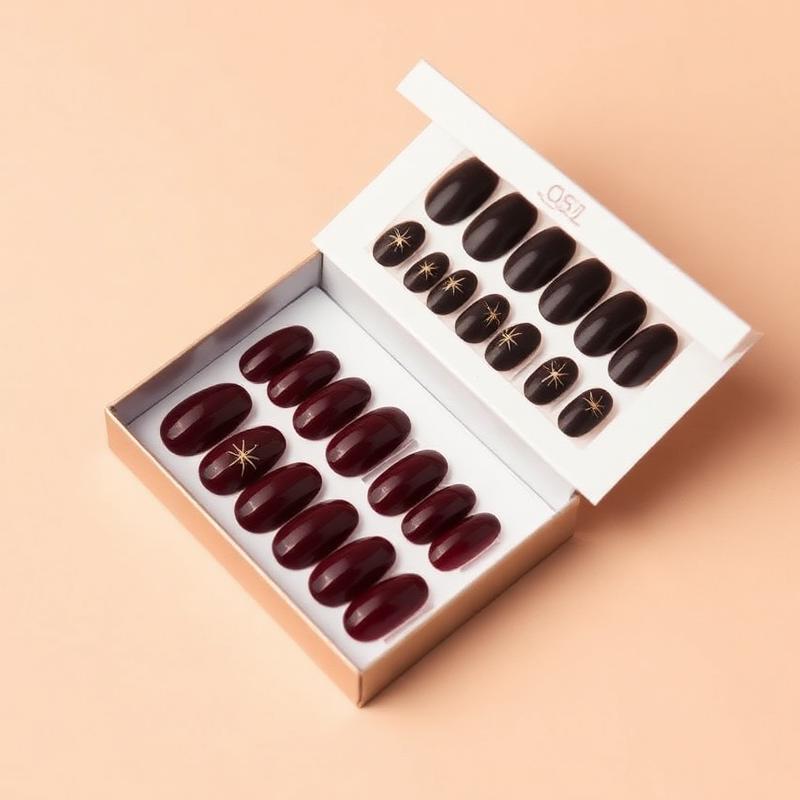
Witching Hour Press-On Nails
Deep burgundy and black press-ons with tiny gold spiderwebs. Ten minutes to apply, and they survive a night of candy wrangling.
Curated pick · Available at Etsy
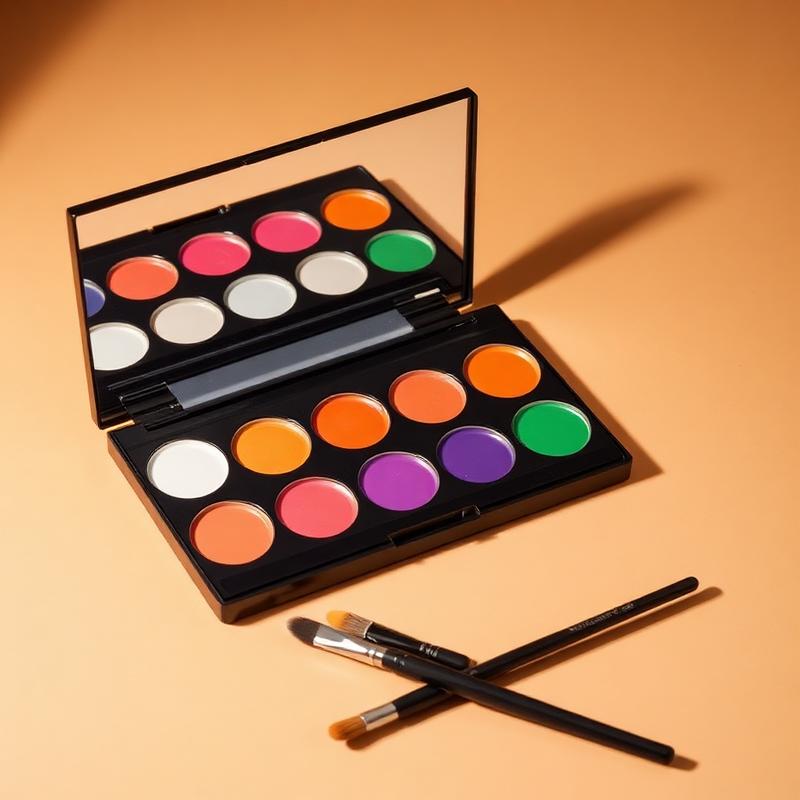
Halloween Face Paint Palette
Twelve highly pigmented, skin-safe pans with fine brushes — for skeleton grins, cat whiskers, and everything in between.
Curated pick · Available at Amazon

Classic Witch Costume Kit
A pointed velvet hat, plum cape, and twig broom in one box — the backbone of about a dozen family costume combinations.
Curated pick · Available at Amazon

Save this for later
Pin this guide to your Halloween board
October comes around fast. Save this now and future-you — standing on the porch with a stapler and a dream — will be grateful.
Save to PinterestFrequently asked questions
How do I stop black polish staining my nails?
Always use a base coat — this is the whole job. Dark pigment sinks into the nail plate directly and leaves a grey-yellow cast for a week or two. If staining has already happened, buff very lightly and leave nails bare for a few days; it grows out.
How do I get a steady hand for nail art lines?
Support the hand rather than practising more. Rest both elbows on a table and brace the little finger of your painting hand against the surface or against your other hand. Most wobble is an unsupported wrist, not a skill problem. Use a striping brush, load it lightly, and pull the line in one movement.
Do I need gel polish for these designs?
Only for the chrome. Chrome powder needs a no-wipe gel topcoat to adhere. Everything else on the list works in regular polish, though gel will last two to three weeks against three to five days.
How long before Halloween should I do my nails?
One or two days before. Polish takes a full day to harden fully, so painting on the morning of a party leaves them vulnerable all evening. If you're wearing a costume, do the nails before you deal with the costume.
What's the fastest design that still looks like effort?
Matte topcoat on one nail over an otherwise neutral manicure. Four minutes, no drawing, and the texture change reads as deliberate. Second fastest is the black micro-French tip.